Reminder: This blog ONLY covers basics that are related to Image Processing. For further information, you are recommended to read the MATLAB Getting Started documentation. Make sure that your MATLAB has been installed Image Processing Toolbox. For information about installing the toolbox, see the MATLAB Installation Guide.
Read an Image
To read an image, use the imread command followed by the name of the image with its extension as an argument. For example below, we are assigning an image named Porsche.tiff to a variable, I:
>>I = imread('Porsche.tiff');
Display an Image
To display the image that we have read, use the imshow command followed by the variable as an argument. A popup window will appeared with the image stored in the variable. Example below will display the image stored in variable I.
>>imshow(I);

Check the Image in Memory
To check how the files are stored in memory, use whos command. As for this case, only I is only stored in the memory, so MATLAB responds with the result of I. These files also can be easily seen in the workspace on the right panel of your MATLAB (this might be different with you MATLAB interface. If you do not have workspace panel, go to Desktop >> Workspace)
>>whos
Name Size Bytes Class Attributes
I 342x546 186732 uint8

Perform Histogram Equalization
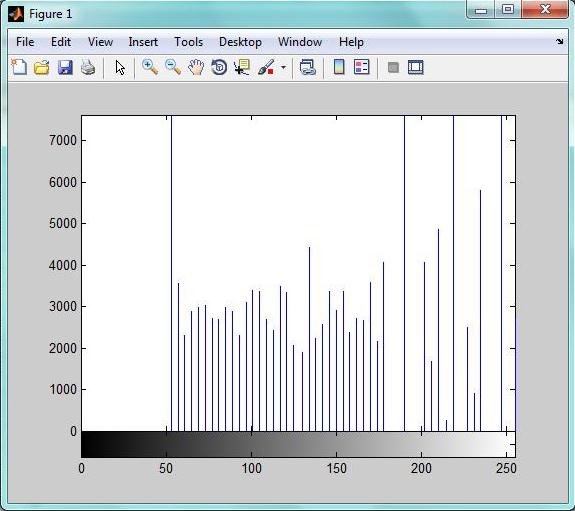
To see the distribution of intensities of the image stored in I, use imhist command followed by the variable I as the argument. For example below, we use figure command to open new figure window and display the histogram.
>>figure, imhist(I)

To spread the intensity values over the full range, use histeq command followed by the variable as the argument. In result, the image will be more contrast. This command is useful if the histogram produced by imhist command gives narrow intensity range.
>>I2 = histeq(I)
>>figure, imshow(I2)

Write the Image
To write the image I2, the image I that we have adjusted, in simple words, we would like to save the image to the disk, use imwrite command followed by the argument consists of the variable and the name and the extension that you want the image saved as. For example below, we would like to save the I2 image as Porsche2.png.
>>imwrite (I2, ‘Porsche2.png’)

Check the Contents of the File
To check the contents of the file, use imfinfo command followed by the name of the file with its extension as the argument. The example below checks the content the newly written file.
>>imfinfo(‘Porsche2.png’)
ans =
Filename: [1x100 char]
FileModDate: '13-Mar-2012 16:50:08'
FileSize: 71980
Format: 'png'
FormatVersion: []
Width: 546
Height: 342
BitDepth: 8
ColorType: 'grayscale'
FormatSignature: [137 80 78 71 13 10 26 10]
Colormap: []
Histogram: []
InterlaceType: 'none'
Transparency: 'none'
SimpleTransparencyData: []
BackgroundColor: []
RenderingIntent: []
Chromaticities: []
Gamma: []
XResolution: []
YResolution: []
ResolutionUnit: []
XOffset: []
YOffset: []
OffsetUnit: []
SignificantBits: []
ImageModTime: '13 Mar 2012 08:50:07 +0000'
Title: []
Author: []
Description: []
Copyright: []
CreationTime: []
Software: []
Disclaimer: []
Warning: []
Source: []
Comment: []
OtherText: []
No comments:
Post a Comment